Share Buttons

Thursday, November 25, 2010

AGLIO OLIO SPAGHETTI

AGLIO OLIO SPAGHETTI
Aglio Oilio is a family favorite dish. I can tell you frankly that I got introduced to western food thanks to me being in Singapore and since we can’t be choosy about eating Indian vegetarian food. I learnt to eat some western food, which are not only healthy but absolutely delicious. One of this is Aglio Olio Spaghetti. When ever I go to this famous casual dining joint called Pastamania which is near my house. I order for this dish, they have choices in normal spaghetti & wholemeal. I always choose the wholemeal one which is a healthier choice. I learnt too cook this at home and now I don’t need to eat out. As it is very easy to cook this and is ready in a jiffy and all enjoy this at home.
Aglio e Olio actually means garlic and oil. This is a traditional Italian pasta dish that can be made cheaply without seasonal or store-bought ingredients. It is said to originate traditionally from the region of Abruzzo, although it is popular across the country.
Usually served with spaghetti, the sauce is made by lightly sautéeing minced or pressed garlic in olive oil, sometimes with the addition of dried red chilli flakes. Finely chopped parsley can be added as a garnish, along with parmesan cheese.
It takes about 20 minutes from start to end and is a favorite dinner or weekend choice at our home, when Iam too tired to cook.

Ingredients
Spaghetti – 1 packet (usually 500 gms)
Garlic -1-2 cloves of garlic, minced, you can add more as per your taste.
Crumbled dried red chilli pepper – ½ tsp, you get this in the store. Don’t use red chilly flakes. If you like it spicy you can add more chilly. If you don’t get it you can use fresh red chillies too.
Extra virgin Olive oil – 2 tablespoons
Salt as per taste
Grated Parmigiano or Pecorino Romano (optional)
Method
In this recipe I have used Linguine (also spelled 'Linguini') spaghetti made from Durum wheat.
Linguine spaghetti(Image courtesy-Wikipedia)
Cook the spaghetti in a large pot of boiling water. The water should be enough that the spaghetti can immerse completely. Once the water starts to boil add salt  as per taste and after a minute or so add the spaghetti. Never cut or break the spaghetti, spaghetti is to be eaten long and they used to make very long spaghetti in olden times. After 10 to 15 minutes (the timing is based on the thickness of the spaghetti and many a times you will find it on the packaging as to the ideal boiling time.
After this drain the water from the spaghetti by using a colander (a vessel with holes known as scolapasta in Italian). Mind you the water is hot and the spaghetti too. So use a mitten and keep your face far when you are draining to avoid the steam gushing to your face. The spaghetti is usually cooked “al dente” (Italian for to the tooth), soft but with texture, sometimes even with bite in the center. However, spaghetti is sometimes cooked to a much softer consistency, especially when you make it for children.
Different varieties of spaghetti take different time to cook. Spaghettoni/Fusilli are thicker spaghetti varieties which takes more time to cook. Spaghettini and vermicelli are very thin spaghettis (both of which may be called angel hair spaghetti in English) which take less time to cook.
Meanwhile, in a wok, add the oil and when it is warm (olive oil comes to smoking point very soon, so don’t leave it on the gas unattended), add the garlic and crumbled red pepper, and sauté them in the oil until the garlic begins to brown. Turn off the heat (the garlic will continue to brown; you don't want it to over brown and become bitter). Now add the cooked spaghetti. If you feel the salt is less you can add salt at this point also.. Toss well till the garlic and chilli flavored oil coats the spaghetti for about 5 mins and serve hot garnished with parsley or coriander leaves whichever is available.

Wednesday, November 17, 2010

TOMATO THOKKU / THAKKALI THOKKU

TOMATO THOKKU / THAKKALI THOKKU
I had bought a kilo of tomatoes accidentally not knowing that there was huge bag of tomatoes lying in my fridge already. Since I had so many tomatoes and I knew that they surely would spoil. I sorted them and picked out the red ripe tomatoes and decided to make this awesome Thokku. (Read all about thokku in this link). Thakkali thokku tastes awesome with curd rice, bread, dosas, chappatis or absolutely anything
The cooking of the tomatoes takes time but the thokku has a shelf life of weeks and you can enjoy it everyday. I have used to 10-12 tomatoes which gives me about 300gms of thokku. If you want more use more tomatoes.

Ingredients
Tomato – 10 - 12
Tamarind paste – 1 tbsp
Fenugreek powder – 1 tsp
Asafoetida - a pinch
Red chilly powder – 1½ tbsp
Mustard seeds for seasoning – 2 tsps
Sesame (Til) oil – 8-10 tbsps
Method
Wash and wipe the tomatoes. Chop them and grind them in a blender along with 1 tablespoon of the tamarind paste. Blend into a puree.
Now in a wok heat 8-10 tablespoons of oil, Add in the mustard seeds and when it crackles, add in the fenugreek powder, red chilly powder, asafetida(referred to as masala hereon) and salt and fry for a few seconds. Be careful and don’t let it get black.
Now, add the Tomato puree and cook until the water evaporates. Check for salt. If required you can add some more at this point.
Cook covered as the water in the tomato starts to splutter.
Cook until you see the tomato puree starts to leave the sides of the pan and the oil starts separating from the mixture.
This indicates that the thokku is done. Turn off the heat and let the thokku come to room temperature, after which you can store it in an air tight container and enjoy as a condiment with any of the dishes mentioned above.
Yo(my husband) was eating it with bread and saying that it tastes great and my mom has it with her curd rice. You can even add some to plain hot rice, mix well, add some oil if you want and eat it plain with papad. "Thokkun chaadam"(Thokku rice)
This can be stored in the refrigerator for many weeks like any other pickle.

(Above picture - A closer look at the tomato thokku)
Tips
• I had readymade fenugreek powder, for those who don’t have it. Dry roast a tablespoon of fenugreek seeds and powder it to use in the thokku. Make it fresh, it tastes better.

• Once the mustard splutters, the temperature of the oil will be very high, so reduce the flame of the gas to sim and add in the powders and when you see them froth just wait for about 10-12 seconds, be careful don’t let the masala get black. Frying the masala imparts great taste to the thokku. If you are not confident, then you can add the masalas later to the puree.
• For those who like garlic, you can add 4-5 pods of garlic (4-5 for Indian garlic which is small in size), if using the bigger sized ones that we get abroad, make it half of the said quantity. Fry the garlic well after the mustard splutters and then add in the masala. If you want you can use garlic paste as well, but ensure to fry it well else the thokku won’t be aromatic.

• You can add chinna vengayam(madras vengayam/shallots/ mini onions), but always fry them once the mustard splutters.

• My mom usually adds green chillies . If you are using green chillies reduce the amount of red chilly powder, else your thokku will be very spicy.

• My grandmom used to add a bit of ginger. When you are adding ginger, make a paste and fry well after the mustard splutters.

You can try any variation that you desire and enjoy this awesome finger licking thokku.

Thursday, November 11, 2010

NUTTY PARATHA

NUTTY PARATHA
Nutty Paratha is something I invented while thinking of how to feed my little one with nutritious food, considering the small portions that she has. She is a fussy eater and it’s tough to feed her. She likes chappati, so I thought of hiding some goodness or the other inside it and feed her. Nuts are good for health so I hid inside the conventional chappati roasted & chopped nuts and she fell for it. The secret was the slight sweetness imparted by the Roasted Sweet almonds, which gave it the taste of Puran poli (but less sweet)
The nuts I used were. (Please click on the link, to know more about the health benefits of the nuts.
Almonds Cashewnuts , Pistachios
You can see that this Paratha is worthy of the royals…..
Ingredients
Whole wheat flour - 2 cups
Roasted sweet Almonds – 3 tbsp
Roasted Cashewnuts – 2 tbsp
Roasted Pistachios – 1 tbsp
Salt to taste
Water for the dough
Oil – 1 tbsp & for cooking the paratha
Method
Mix the wheat flour, one tablespoon of oil, salt, mix well and make a dough adding a bit of warm water. Now slowly add in some warm water to make the dough. Knead it well till it becomes one uniform dough mix. Keep aside for half an hour. After this knead again well. Make small balls of the dough and roll it into a puri first, fill in the roasted & chopped nuts )close the filling by making it into half moon shape and then roll the sides and make a ball and then roll again like you do for chappati .
Then cook the Nutty Parathas on a flat bottomed pan (tava) using a few drops of oil / ghee, till u see brown spots appear on both sides as in the picture. Serve the hot parathas with any sabji of your choice.

Friday, November 5, 2010

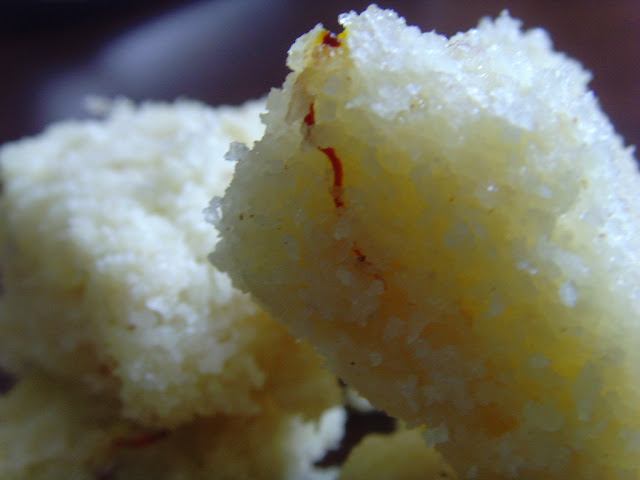
NAARIYAL KA BARFI / COCONUT BARFI / KOPRA PAAK / COCONUT FUDGE

I Wish All My Readers A Very Happy & Prosperous Deepawali

COCONUT BARFI
Also known as Kopra Paak in Maharashtra
I absolutely adore this wonderful sweet and it used to be my favorite sweet during my childhood and I would happily indulge in it without a care in this world. Nowadays health is a priority and sweet coconut indulgences are a definite no-no, but this Diwali I was remembering my younger, carefree days and decided to make this coconut delight to refresh the fond memories of my childhood when food was associated with smell, taste and indulgent pleasures without a care for health.  Here is a very easy recipe to help you prepare this delicious fudge which you can indulge in….at least during festive times.

NAARIYAL KA BARFI (COCONUT FUDGE)

Ingredients
Coconut - 2 cups grated
Sugar – 1 cup
Cardamom (elaichi) powder – ¼ tsp
Ghee – 2 tbsps
Saffron (kesar) strands – a pinch
Method
Grate the coconut (don’t grate until the shell, else your barfi won’t be nice and white in color).
In a wok, Take one tablespoon of ghee and lightly roast the grated coconut on a low heat
Add cardamom and mix well. Prepare one-string syrup by dissolving sugar in the water.
Now stir the coconut mixture into the syrup. Keep stirring until it mixes well and leaves the sides of the pan. Add, a few strands of saffron to the mixture. Add a tablespoon of ghee and mix well. The mixture gets rounded like a ball and looks a bit dry at this point turn off the flame.
Grease a plate with ghee. Spread the prepared mixture evenly over the plate and allow it to cool. Cut it into square / diamond shapes with a knife while it is warm. Don’t try to cut it when it’s hot. Nariyal ka burfi is ready to be served.

Saturday, October 16, 2010

GLIMPSES OF NAVARATRI IN SINGAPORE & KONDAI KADALAI SUNDAL

GLIMPSES OF NAVARATRI IN SINGAPORE & KONDAI KADALAI SUNDAL
from me to all my readers with love....
Glimpses of Navaratri Festival in Singapore....
The temple at my home


Beautiful Marapaachi dolls, wooden dolls decorated by me. Please click on link wooden dolls to learn how I decorated it @ my blog Sukanya's hobbies and crafts.


Beautiful ombodhu padhi(9 steps) golu at Siva Durga Temple @ Potong Pasir, Singapore.


Dandiya Raas at the Swimming complex, organized by the Gujarati mandal, Singapore

KONDA KADALAI SUNDAL
Konda Kadalai Sundal gets its name because it has a dome on top representing a kondai(a knot). Every chana or kadalai should have distinctive name so this was equated to a hair knot tied by women. It is made during the Navaratri festival. It is also distributed as Prasad in temples.

Ingredients
Konda Kadalai - 250 grams
Mustard seeds - 1 tsp
Udad dal - 1 tsp
Green chillies – 3-4
Red chillies – 1-2 broken into 2 halves
Turmeric -1/4 tsp
Asafetida (Hing) - a small pinch
Freshly grated Coconut – 1-2 tbsps
Cooking oil - 1 tbsp
Salt as per taste.
Curry leaves – a sprig
Coriander leaves for garnish
Method
Soak the Konda Kadalai in water overnight. In the morning rinse out well, add some turmeric powder and a cup of water and pressure cook it for about 3-4 whistles. Don’t throw the water in which the chana has been boiled as it contains a lot of nutrients. Keep the boiled chana aside.
In a Kadhai (wok), Add oil, when it is hot, Add the mustard seeds and when they begin to crackle, Add udad dal and the red chillies, when the udad dal becomes slightly pink, add the green chillies and the curry leaves and fry well, now add in the boiled Konda kadalai and turmeric, asafetida and salt. Mix well. Cover the kadhai with a lid. Don’t add water, The boiled chana already has some water, so let it cook. Once all the water is soaked up Add freshly grated coconut and some coriander leaves and mix well.
Serve hot with Rice and Rasam or enjoy it as it is.

Thursday, October 7, 2010

Matar Paneer

Matar Paneer
Matar Paneer or Mutter Paneer this yummy dish hails from the North of India curry but is most popular now with one and all. I even see Europeans eating this with much relish thanks to it not being so spicy or because the paneer & the cream beats the spice and makes it mild and palatable. It’s a simple dish and anybody can make it.

Ingredients
Paneer - 500 gms (cut into cubes of 1 inch each)
Green Peas - 250 gms
Cumin seeds – 1 tsp
Onions – 2
Green Chillies - 2
Ginger paste -1 tbsp
Tomato puree - 3 tbsp
Garam Masala – 2 tsps
Red chilly powder – 1 tsp if required
Garam masala - 2 tsps
Oil – 2-3 tbsps
Salt to taste
Cream – 2 tbsps
Coriander leaves chopped fine to garnish
Method
Heat 2-3 tbsps of oil in a pan and gently stir-fry the cubes of paneer till golden. Remove onto a paper towel and keep aside.
Grind onions, green chilly and ginger into a fine paste in a mixie. Keep aside.
Using the same oil in which we fried the paneer cubes. Add cumin seeds and when they get fried, add the onion, green chilly, ginger paste and fry it till it turns light brown.
Add the tomato puree and sauté for another 2 minutes.
Add the coriander, cumin, red chilly powder, turmeric and garam masala powders and fry, stirring continuously till the oil begins to separate from the masala (spice mixture).
Add the peas to the masala and fry for 2-3 minutes.
Then add the paneer, water and salt, reduce flame to a simmer and cook till the gravy thickens.
When the gravy is as thick as you would like, turn off the flame and stir in the cream.
Garnish with coriander leaves and serve.
Mutter paneer tastes great with parathas, naans and even jeera rice.
This being a authentic Punjabi dish I would like to send this "Flavors of Punjab" event hosted by Pari in her blog, this event was originally started by Nayna
Since this is Tried and tasted I would like to send this to Ria's Tried and Tasted event which was started by Lakshmi
Since kids will enjoy this with chappati or rice in their lunch box and it also nutritious and healthy, I would like to pack some to "Lunchbox Treats" event by Smitha. 

Monday, August 30, 2010

MOONG DALVADA (SAVORY MOONG BALLS) & MOONG VADA DE DAHI BHALLE MASALA BOONDI KE SUNG (SAVORY LENTIL BALLS WITH SPICY & TANGY BOONDI IN YOGURT)

Since I am blogging infrequently these days, here is a double dhamaka……
MOONG DALVADA (SAVORY MOONG BALLS)
Moong dal vada - the vada with a healthy twist. The moong bean is popular as the perfect food for reducing weight. It is recommended as a food replacement in many slimming programs, as it has a very low fat content. It is a rich source of protein and fiber, which helps one to lower the high cholesterol level in the blood system.
The high fiber content of moong beans yields complex carbohydrates, which aid digestion. Complex carbs are also effective in stabilizing blood sugar and prevent its rapid rise after meal consumption, apart from keeping body’s energy at a balanced level. Those who suffer from diabetes or high cholesterol are recommended frequent consumption of moong bean. So imagine frying such a guilt free lentil reduces the guilt factor in eating fried foods now doesn’t it?
Ingredients
Yellow moong dal – 250 gms
Ginger – ½ inch piece
Green Chillies – 4-5
Turmeric powder – 1 tsp
Red chilly powder – 2 tsps
Asafetida – 1 tsp
Curry leaves – a sprig
Corriander leaves – 2 tbsps finely chopped.
Salt as per taste
Method
Soak moong dal for 3 to 4 hours. Rinse it well. Grind the dal with the green chillies, ginger, turmeric powder, Red chilly powder, Asafetida without adding water into a coarse paste. It shouldn’t be a fine paste, the batter should be of thick consistency, so don’t over grind the dal. If you are having trouble grinding you can add about 2-3 tbsps of water, but make sure the batter doesn’t get too soggy else the vada will absorb more oil and be very oily.
After you make a coarse batter of the moong dal, add curry leaves and freshly chopped coriander leaves into it.
For those who like some more flavor you can add one big finely chopped onion to this batter before you fry. (My recipe doesn’t have onions)
Heat oil in a frying pan and when the oil is hot, put small balls of the batter, shouldn’t be too even(very round) while dropping, when dropped unevenly it will be more crispy. Fry the vadas till golden and crisp, remove and drain on a kitchen towel to remove excess oil. Serve hot with coconut chutney or green chutney.

LEFTOVER SPECIAL
MOONG VADA DE DAHI BHALLE MASALA BOONDI KE SUNG (SAVORY LENTIL BALLS WITH SPICY & TANGY BOONDI IN YOGURT)
Believe me it was the most awesome dahi bhallas ever!!!!! Lip smacking, cold and crunchy delight. The family is asking for more. Maybe next time I will make more moong vadas so that there is a lot leftover. I think the taste was because of the flavor in the vada in itself. (My moong vadas didn’t have onions). The boondis were added as a innovative twist for a dash of tangy masala and crunch in the usual dahi bhalla recipe.

Ingredients
Leftover Moong Vadas- 10-12 pieces
Dahi(Thick Yogurt) - 5 cups
Milk – ½ cup
Sugar - 4 tsps (yogurt should taste little sweet)
Salt as per taste
Cumin powder – 2 tsps
Red chilly powder – 2 tsps
Masala Boondi (readily available in the market) – 3 tbsps
Finely chopped coriander leaves – 1 tbsp
Method
I had kept the leftover moong vadas in the refrigerator, so they had become hard. The first thing I had to do was soften it, so I put the vadas in boiling water and let it boil for about 5 minutes. This not only made the vadas become soft but also increased in size and the best part is I saw the oil floating out. I threw the water and squeezed out water from each wada and kept the soft bhalles aside.
Now, for the yogurt mix - Blend the yogurt and milk until it is smooth. Add sugar, salt, cumin and chilly powder and blend well with a spatula. Keep the yogurt in refrigerator until it is chilled.
To serve
Arrange the squeezed vadas in a bowl or deep dish. Sprinkle some Masala Boondi on to it. Pour the chilled yogurt on the wadas such that all the vadas and masala boondi are covered well by the yogurt. Sprinkle red chiili powder and roasted jeera powder on top and garnish with freshly chopped coriander leaves. Serve immediately else the vadas & boondi will absorb all the yogurt.
Sending my dahi bhalles to PJ's Scrumptious Delights from Leftovers Event.
I am also sending these to Kitchen Flavors' Yummy Food : Joy from Fasting to Feasting-Season III and Happy Ramadan wishes to her

Thursday, August 5, 2010

KHAMAN DHOKLA REVISITED

KHAMAN DHOKLA
Gujarat is most famous for its fluffy and light Khaman Dhoklas. Dhokla or 'Khumman' is made with a fermented batter of chickpeas.
My dearest hubby Yo is a great fan of this dish and it can cheer him up anytime, whether served during a meal or as a tea time snack.
Ingredients
Besan (gram flour) - 1 cup
Semolina (Rava) - 1 1/2 tablespoons
Sugar – 1tbsp
Ginger paste - 1 teaspoon
Green chilly paste - 1 teaspoon
Citric Acid (Nimbu ke phool) - 1/2 teaspoon or Lemon juice – 1 tsp
Eno Fruit salt or Soda Bicarb – 1 ½ tsp
For the tempering
Oil - 1 tbsp
Mustard seeds – ½ tsp
Cumin seeds – ½ tsp
White Sesame seeds (til) – ½ tsp
Green chillies – 2-3
Curry leaves – A sprig
Asafetida (hing) - a pinch
For the garnish
Freshly grated Coconut – 1 tbsp
Coriander leaves – 1tbsp
Method
In a big bowl add in all the ingredients except the Eno fruit salt and mix well using water to make a thick idli like batter. Let this rest for 10 minutes.
Add in the Eno fruit salt or Soda bicarb, Add little water and mix well. You will notice that the mixture rises. Don’t wait too long once the batter rises. When you see that the batter has risen immediately pour it onto a greased thali and steam, else your dholkas won’t turn out puffy and nice. Remember the batter should’nt rest after adding the fruit salt. Once the batter is poured into a deep greased plate steam for about 10 - 15 minutes in a pressure cooker without the whistle or in a steamer. When it’s done in a pressure cooker, keep it for about 10 minutes after you hear the whooshing sound of steam coming out through the top nozzle. Once you turn off the gas, let the dhoklas rest for a while. Check with a knife, insert into the cake, if it comes free your dhoklas are done. If not steam cook for some more time.
For the tempering, heat the oil in a small pan and add the mustard seeds, When the mustard seeds crackle add in the cumin seeds & sesame seeds. Fry 2 -3 whole green chillies with the stalk, Add the curry leaves, Add in some asafetida and pour this over the steamed dhoklas.
Garnish with Finely chopped coriander leaves and some freshly grated coconut. I also garnished my dhokla with some sev as seen in the picture above. Cut into pieces and serve with coriander chutney or tamarind and date chutney.

Since Dhoklas are unarguably a definite Gujarati snack I would like to send them to Nayna's Flavours of Gujrat event.

I would love to send it to Akila who is celebrating India's Independence day with her CID-2010 event.


Dhokla being a definite party treat I would like to send this to Sara who is hosting MM party treats

Since Dhokla is made with Besan (Bengal gram Dal)/Chickpea flour) I would like to send it to MLLA26 hosted by Briciole and started by Susan

The wonderfully light and fluffy dhoklas also goes to Two For Tuesdays started by Alex of  A Moderate Life.
I am also packing off some of the dhoklas garnished with mustard seeds, cumin seeds, sesame seeds, sev, curry leaves & fried chilly to Sanyukta's Visual Treat Event
Dhokla being a light tea time snack goes to Sharmi's Let's Munch-Light Tea Time Snacks Event


I am also sending dhoklas to Ayeesha's Iftar Moments Hijri 1431 Event in her blog Taste of Pearl City

Friday, July 30, 2010

ALL ABOUT THOKKU & PUDINA THOKKU PICKLE/ MINT LEAVES THOKKU

ALL ABOUT THOKKU
All tamilians know what a thokku is and what is it’s significance in their lives. Thokku is halfway between a thogayal and a pickle. It has a longer shelf life like a pickle and there is no coconut used in the recipe.
Just like in a thogayal/thuvayal, chopped/grated vegetables are blended to a paste with spices, but without adding water. The water content in the vegetables are also reduced by slow cooking. This helps in preserving the thokku and giving it a longer shelf life. The thokku can be kept out of the refrigerator for a week after it is made and after that for over a month in the refrigerator.
Thokku can be used as a dip, spread, or a pickle. You can eat it with Bread, Chappatis, dosa, upma and curd rice or eat it mixed with hot rice and ghee.
Almost all vegetables without too much water content can be turned into Thokkus. Experiment with exotic vegetables as long as you remain true to the spirit of the recipe.
When using sour stuff as the base, you need not add tamarind.
To make your thokku have a longer shelf life:
  • Use fresh vegetables.
  • Wash and completely dry vegetables, bottles and spoons.
  • Never use a wet spoon or your bare hands to touch the thokku. Even a tiny bit of water can spoil it.
  • Aluminum, plastic or brass vessels react with the acid in thokku and should be avoided. Use glass / stainless steel / porcelain jars.
  • Salt always has moisture in it. So dry roast it / dry it in sun for a day before using it.
  • Refrigerate thokku to make them last much longer.
  • Have a layer of oil over thokku to seal the surface.
  • Mix in a pinch of preservatives like sodium benzoate / citric acid to make your thokku last longer.

Here is a tasty and refreshing recipe of The Mint leaves Thokku
PUDINA THOKKU PICKLE/ MINT LEAVES THOKKU

Ingredients
Pudina Leaves – 1 bunch
Tamarind Paste – 1 tsp
Gingelly Oil / Any edible vegetable oil -  5 tbsps
Udad dal – 1 tsp
Fenugreek seeds – ¼ tsp
Red Chilly - 4
Asafoetida – ½ tsp
Mustard – 1 tsp
Salt as per taste
Method
Dry roast the Udad, Red chillies, Fenugreek seeds and grind into a fine powder. Keep aside.
Wash the pudinah leaves well and fry in 2 tsps oil till it is reduced, dry and changed its color. Cool and grind it coarse in a mixie.
Heat the remaining oil in a pan, add the mustard seeds and when it begins to crackle, add in the ground powders and fry for half a minute, it shouldn’t become black, then add the tamarind paste and cook for a minute, after this add the coarsely ground mint leaves, and salt as per taste. Mix it all well. Keep stirring continuously till the water evaporates and it becomes one uniform mixture. After a while you will see the oil separates from the mixture and floats on top. This is the indication that it is done. Put off the gas and let it cool and enjoy it as a dip, spread or a pickle.

Monday, July 19, 2010

CHOW CHOW KOOTU (CHAYOTE / BANGALORE KATRIKKAI IN COCONUT GRAVY)

CHOW CHOW KOOTU (CHAYOTE / BANGALORE KATRIKKAI IN COCONUT GRAVY)While growing up in Mumbai I had never ever had this vegetable and when I moved to Singapore I saw an abundance of this vegetable. As usual I asked the Indian Grocery shop person what's this and how it is cooked. Now, most pf the guys who work for the Indian shop are from the villages of India and know a lot about cooking and our South Indian traditional dishes. The guy said, "Just make a kootu with it". So i bought the Chayote thinking to myself hope it turns out well. 
Chayote belongs to the Gourd family along with melons, cucumbers and squash. 
Chayote in India is locally known as Chow Chow (Doesn't that sound like a pet name). It's also known as Bangalore Katrikkai (Eggplants/Aubergines from a place called Bangalore in India).


For those unfamiliar about this vegetable, some info on it
Chayote/Chow Chow/ Bangalore Katrikkai is light green in color, usually pear shaped and sometimes has wrinkles. In Singapore I sometimes see thorn like structures growing at the base of the Chayote. It's a good source of amino acids and vitamin C.
The leaves and fruit have diuretic, cardiovascular and anti-inflammatory properties, and a tea made from the leaves has been used in the treatment of arteriosclerosis and hypertension, and to dissolve kidney stones.
(Some info courtesy :Wikipedia)
With health benefits to add on, I decided to cook it in the below manner. I must say that it turned out yummy and from then on this is on our vegetables shopping list too. Do try and let me know how you like it.


Ingredients
Chow Chow - 1
Yellow split Moong dal – ½ cup
Grated Coconut – 2 tbsp
Red chillies – 2-3 nos.
Curry leaves – 5-6
Udad dal – 1 tbsp
Mustard – 1 tbsp
Cumin seeds – 1 tbsp
Turmeric powder – ½ tsp
Oil – 1 tsp
Salt as per taste

Method
Peel the chow chow and cut into square chunks. Keep aside. Rinse out the moong dal well. In a vessel, mix washed moong dal and little amount of water. Add turmeric powder. Cook it until almost done, add in the chayote, pour ½ cup water and cook until the chayote is soft and the moong dal is totally mashed. Chayote cooks very quickly.  Add salt as per taste at this stage, as sometimes if you add salt to the moong dal it may not cook or take time to cook.
Grind the red chillies(1-2nos), Cumin seeds and coconut to a fine paste in a blender and add to the cooked chayote and dal mixture.
Heat the oil. Add mustard seeds and udad dal and when it crackles add the curry leaves and one red chilly and pour it on the cooked chayote. 
Enjoy this Chow chow kootu with Chappatis or hot rice and pappads.


TIPS
  • Diabetics and Weight watchers, can avoid the coconut.

VARIATIONS
  • You can add Onion and Tomato to this recipe if avoiding coconut, to give it a good flavor. In case adding Onion and tomato, add oil, fry the Onions, one transparent, add the tomatoes and cook until squashy before adding the chayote in the above recipe, This will infuse all the flavors into the chayote while cooking.


LinkWithin

Related Posts with Thumbnails
LinkWithin Related Stories Widget for Blogs
YOUR TEXT HERE