Share Buttons

Friday, November 5, 2010

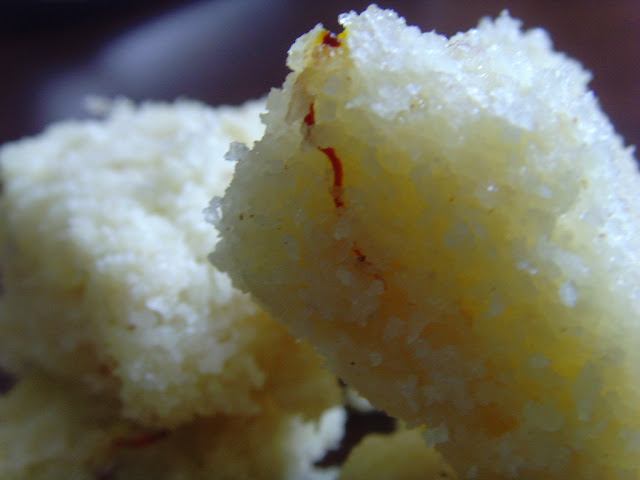
NAARIYAL KA BARFI / COCONUT BARFI / KOPRA PAAK / COCONUT FUDGE

I Wish All My Readers A Very Happy & Prosperous Deepawali

COCONUT BARFI
Also known as Kopra Paak in Maharashtra
I absolutely adore this wonderful sweet and it used to be my favorite sweet during my childhood and I would happily indulge in it without a care in this world. Nowadays health is a priority and sweet coconut indulgences are a definite no-no, but this Diwali I was remembering my younger, carefree days and decided to make this coconut delight to refresh the fond memories of my childhood when food was associated with smell, taste and indulgent pleasures without a care for health.  Here is a very easy recipe to help you prepare this delicious fudge which you can indulge in….at least during festive times.

NAARIYAL KA BARFI (COCONUT FUDGE)

Ingredients
Coconut - 2 cups grated
Sugar – 1 cup
Cardamom (elaichi) powder – ¼ tsp
Ghee – 2 tbsps
Saffron (kesar) strands – a pinch
Method
Grate the coconut (don’t grate until the shell, else your barfi won’t be nice and white in color).
In a wok, Take one tablespoon of ghee and lightly roast the grated coconut on a low heat
Add cardamom and mix well. Prepare one-string syrup by dissolving sugar in the water.
Now stir the coconut mixture into the syrup. Keep stirring until it mixes well and leaves the sides of the pan. Add, a few strands of saffron to the mixture. Add a tablespoon of ghee and mix well. The mixture gets rounded like a ball and looks a bit dry at this point turn off the flame.
Grease a plate with ghee. Spread the prepared mixture evenly over the plate and allow it to cool. Cut it into square / diamond shapes with a knife while it is warm. Don’t try to cut it when it’s hot. Nariyal ka burfi is ready to be served.

Saturday, October 16, 2010

GLIMPSES OF NAVARATRI IN SINGAPORE & KONDAI KADALAI SUNDAL

GLIMPSES OF NAVARATRI IN SINGAPORE & KONDAI KADALAI SUNDAL
from me to all my readers with love....
Glimpses of Navaratri Festival in Singapore....
The temple at my home


Beautiful Marapaachi dolls, wooden dolls decorated by me. Please click on link wooden dolls to learn how I decorated it @ my blog Sukanya's hobbies and crafts.


Beautiful ombodhu padhi(9 steps) golu at Siva Durga Temple @ Potong Pasir, Singapore.


Dandiya Raas at the Swimming complex, organized by the Gujarati mandal, Singapore

KONDA KADALAI SUNDAL
Konda Kadalai Sundal gets its name because it has a dome on top representing a kondai(a knot). Every chana or kadalai should have distinctive name so this was equated to a hair knot tied by women. It is made during the Navaratri festival. It is also distributed as Prasad in temples.

Ingredients
Konda Kadalai - 250 grams
Mustard seeds - 1 tsp
Udad dal - 1 tsp
Green chillies – 3-4
Red chillies – 1-2 broken into 2 halves
Turmeric -1/4 tsp
Asafetida (Hing) - a small pinch
Freshly grated Coconut – 1-2 tbsps
Cooking oil - 1 tbsp
Salt as per taste.
Curry leaves – a sprig
Coriander leaves for garnish
Method
Soak the Konda Kadalai in water overnight. In the morning rinse out well, add some turmeric powder and a cup of water and pressure cook it for about 3-4 whistles. Don’t throw the water in which the chana has been boiled as it contains a lot of nutrients. Keep the boiled chana aside.
In a Kadhai (wok), Add oil, when it is hot, Add the mustard seeds and when they begin to crackle, Add udad dal and the red chillies, when the udad dal becomes slightly pink, add the green chillies and the curry leaves and fry well, now add in the boiled Konda kadalai and turmeric, asafetida and salt. Mix well. Cover the kadhai with a lid. Don’t add water, The boiled chana already has some water, so let it cook. Once all the water is soaked up Add freshly grated coconut and some coriander leaves and mix well.
Serve hot with Rice and Rasam or enjoy it as it is.

Thursday, October 7, 2010

Matar Paneer

Matar Paneer
Matar Paneer or Mutter Paneer this yummy dish hails from the North of India curry but is most popular now with one and all. I even see Europeans eating this with much relish thanks to it not being so spicy or because the paneer & the cream beats the spice and makes it mild and palatable. It’s a simple dish and anybody can make it.

Ingredients
Paneer - 500 gms (cut into cubes of 1 inch each)
Green Peas - 250 gms
Cumin seeds – 1 tsp
Onions – 2
Green Chillies - 2
Ginger paste -1 tbsp
Tomato puree - 3 tbsp
Garam Masala – 2 tsps
Red chilly powder – 1 tsp if required
Garam masala - 2 tsps
Oil – 2-3 tbsps
Salt to taste
Cream – 2 tbsps
Coriander leaves chopped fine to garnish
Method
Heat 2-3 tbsps of oil in a pan and gently stir-fry the cubes of paneer till golden. Remove onto a paper towel and keep aside.
Grind onions, green chilly and ginger into a fine paste in a mixie. Keep aside.
Using the same oil in which we fried the paneer cubes. Add cumin seeds and when they get fried, add the onion, green chilly, ginger paste and fry it till it turns light brown.
Add the tomato puree and sauté for another 2 minutes.
Add the coriander, cumin, red chilly powder, turmeric and garam masala powders and fry, stirring continuously till the oil begins to separate from the masala (spice mixture).
Add the peas to the masala and fry for 2-3 minutes.
Then add the paneer, water and salt, reduce flame to a simmer and cook till the gravy thickens.
When the gravy is as thick as you would like, turn off the flame and stir in the cream.
Garnish with coriander leaves and serve.
Mutter paneer tastes great with parathas, naans and even jeera rice.
This being a authentic Punjabi dish I would like to send this "Flavors of Punjab" event hosted by Pari in her blog, this event was originally started by Nayna
Since this is Tried and tasted I would like to send this to Ria's Tried and Tasted event which was started by Lakshmi
Since kids will enjoy this with chappati or rice in their lunch box and it also nutritious and healthy, I would like to pack some to "Lunchbox Treats" event by Smitha. 

Monday, August 30, 2010

MOONG DALVADA (SAVORY MOONG BALLS) & MOONG VADA DE DAHI BHALLE MASALA BOONDI KE SUNG (SAVORY LENTIL BALLS WITH SPICY & TANGY BOONDI IN YOGURT)

Since I am blogging infrequently these days, here is a double dhamaka……
MOONG DALVADA (SAVORY MOONG BALLS)
Moong dal vada - the vada with a healthy twist. The moong bean is popular as the perfect food for reducing weight. It is recommended as a food replacement in many slimming programs, as it has a very low fat content. It is a rich source of protein and fiber, which helps one to lower the high cholesterol level in the blood system.
The high fiber content of moong beans yields complex carbohydrates, which aid digestion. Complex carbs are also effective in stabilizing blood sugar and prevent its rapid rise after meal consumption, apart from keeping body’s energy at a balanced level. Those who suffer from diabetes or high cholesterol are recommended frequent consumption of moong bean. So imagine frying such a guilt free lentil reduces the guilt factor in eating fried foods now doesn’t it?
Ingredients
Yellow moong dal – 250 gms
Ginger – ½ inch piece
Green Chillies – 4-5
Turmeric powder – 1 tsp
Red chilly powder – 2 tsps
Asafetida – 1 tsp
Curry leaves – a sprig
Corriander leaves – 2 tbsps finely chopped.
Salt as per taste
Method
Soak moong dal for 3 to 4 hours. Rinse it well. Grind the dal with the green chillies, ginger, turmeric powder, Red chilly powder, Asafetida without adding water into a coarse paste. It shouldn’t be a fine paste, the batter should be of thick consistency, so don’t over grind the dal. If you are having trouble grinding you can add about 2-3 tbsps of water, but make sure the batter doesn’t get too soggy else the vada will absorb more oil and be very oily.
After you make a coarse batter of the moong dal, add curry leaves and freshly chopped coriander leaves into it.
For those who like some more flavor you can add one big finely chopped onion to this batter before you fry. (My recipe doesn’t have onions)
Heat oil in a frying pan and when the oil is hot, put small balls of the batter, shouldn’t be too even(very round) while dropping, when dropped unevenly it will be more crispy. Fry the vadas till golden and crisp, remove and drain on a kitchen towel to remove excess oil. Serve hot with coconut chutney or green chutney.

LEFTOVER SPECIAL
MOONG VADA DE DAHI BHALLE MASALA BOONDI KE SUNG (SAVORY LENTIL BALLS WITH SPICY & TANGY BOONDI IN YOGURT)
Believe me it was the most awesome dahi bhallas ever!!!!! Lip smacking, cold and crunchy delight. The family is asking for more. Maybe next time I will make more moong vadas so that there is a lot leftover. I think the taste was because of the flavor in the vada in itself. (My moong vadas didn’t have onions). The boondis were added as a innovative twist for a dash of tangy masala and crunch in the usual dahi bhalla recipe.

Ingredients
Leftover Moong Vadas- 10-12 pieces
Dahi(Thick Yogurt) - 5 cups
Milk – ½ cup
Sugar - 4 tsps (yogurt should taste little sweet)
Salt as per taste
Cumin powder – 2 tsps
Red chilly powder – 2 tsps
Masala Boondi (readily available in the market) – 3 tbsps
Finely chopped coriander leaves – 1 tbsp
Method
I had kept the leftover moong vadas in the refrigerator, so they had become hard. The first thing I had to do was soften it, so I put the vadas in boiling water and let it boil for about 5 minutes. This not only made the vadas become soft but also increased in size and the best part is I saw the oil floating out. I threw the water and squeezed out water from each wada and kept the soft bhalles aside.
Now, for the yogurt mix - Blend the yogurt and milk until it is smooth. Add sugar, salt, cumin and chilly powder and blend well with a spatula. Keep the yogurt in refrigerator until it is chilled.
To serve
Arrange the squeezed vadas in a bowl or deep dish. Sprinkle some Masala Boondi on to it. Pour the chilled yogurt on the wadas such that all the vadas and masala boondi are covered well by the yogurt. Sprinkle red chiili powder and roasted jeera powder on top and garnish with freshly chopped coriander leaves. Serve immediately else the vadas & boondi will absorb all the yogurt.
Sending my dahi bhalles to PJ's Scrumptious Delights from Leftovers Event.
I am also sending these to Kitchen Flavors' Yummy Food : Joy from Fasting to Feasting-Season III and Happy Ramadan wishes to her

Thursday, August 5, 2010

KHAMAN DHOKLA REVISITED

KHAMAN DHOKLA
Gujarat is most famous for its fluffy and light Khaman Dhoklas. Dhokla or 'Khumman' is made with a fermented batter of chickpeas.
My dearest hubby Yo is a great fan of this dish and it can cheer him up anytime, whether served during a meal or as a tea time snack.
Ingredients
Besan (gram flour) - 1 cup
Semolina (Rava) - 1 1/2 tablespoons
Sugar – 1tbsp
Ginger paste - 1 teaspoon
Green chilly paste - 1 teaspoon
Citric Acid (Nimbu ke phool) - 1/2 teaspoon or Lemon juice – 1 tsp
Eno Fruit salt or Soda Bicarb – 1 ½ tsp
For the tempering
Oil - 1 tbsp
Mustard seeds – ½ tsp
Cumin seeds – ½ tsp
White Sesame seeds (til) – ½ tsp
Green chillies – 2-3
Curry leaves – A sprig
Asafetida (hing) - a pinch
For the garnish
Freshly grated Coconut – 1 tbsp
Coriander leaves – 1tbsp
Method
In a big bowl add in all the ingredients except the Eno fruit salt and mix well using water to make a thick idli like batter. Let this rest for 10 minutes.
Add in the Eno fruit salt or Soda bicarb, Add little water and mix well. You will notice that the mixture rises. Don’t wait too long once the batter rises. When you see that the batter has risen immediately pour it onto a greased thali and steam, else your dholkas won’t turn out puffy and nice. Remember the batter should’nt rest after adding the fruit salt. Once the batter is poured into a deep greased plate steam for about 10 - 15 minutes in a pressure cooker without the whistle or in a steamer. When it’s done in a pressure cooker, keep it for about 10 minutes after you hear the whooshing sound of steam coming out through the top nozzle. Once you turn off the gas, let the dhoklas rest for a while. Check with a knife, insert into the cake, if it comes free your dhoklas are done. If not steam cook for some more time.
For the tempering, heat the oil in a small pan and add the mustard seeds, When the mustard seeds crackle add in the cumin seeds & sesame seeds. Fry 2 -3 whole green chillies with the stalk, Add the curry leaves, Add in some asafetida and pour this over the steamed dhoklas.
Garnish with Finely chopped coriander leaves and some freshly grated coconut. I also garnished my dhokla with some sev as seen in the picture above. Cut into pieces and serve with coriander chutney or tamarind and date chutney.

Since Dhoklas are unarguably a definite Gujarati snack I would like to send them to Nayna's Flavours of Gujrat event.

I would love to send it to Akila who is celebrating India's Independence day with her CID-2010 event.


Dhokla being a definite party treat I would like to send this to Sara who is hosting MM party treats

Since Dhokla is made with Besan (Bengal gram Dal)/Chickpea flour) I would like to send it to MLLA26 hosted by Briciole and started by Susan

The wonderfully light and fluffy dhoklas also goes to Two For Tuesdays started by Alex of  A Moderate Life.
I am also packing off some of the dhoklas garnished with mustard seeds, cumin seeds, sesame seeds, sev, curry leaves & fried chilly to Sanyukta's Visual Treat Event
Dhokla being a light tea time snack goes to Sharmi's Let's Munch-Light Tea Time Snacks Event


I am also sending dhoklas to Ayeesha's Iftar Moments Hijri 1431 Event in her blog Taste of Pearl City

Friday, July 30, 2010

ALL ABOUT THOKKU & PUDINA THOKKU PICKLE/ MINT LEAVES THOKKU

ALL ABOUT THOKKU
All tamilians know what a thokku is and what is it’s significance in their lives. Thokku is halfway between a thogayal and a pickle. It has a longer shelf life like a pickle and there is no coconut used in the recipe.
Just like in a thogayal/thuvayal, chopped/grated vegetables are blended to a paste with spices, but without adding water. The water content in the vegetables are also reduced by slow cooking. This helps in preserving the thokku and giving it a longer shelf life. The thokku can be kept out of the refrigerator for a week after it is made and after that for over a month in the refrigerator.
Thokku can be used as a dip, spread, or a pickle. You can eat it with Bread, Chappatis, dosa, upma and curd rice or eat it mixed with hot rice and ghee.
Almost all vegetables without too much water content can be turned into Thokkus. Experiment with exotic vegetables as long as you remain true to the spirit of the recipe.
When using sour stuff as the base, you need not add tamarind.
To make your thokku have a longer shelf life:
  • Use fresh vegetables.
  • Wash and completely dry vegetables, bottles and spoons.
  • Never use a wet spoon or your bare hands to touch the thokku. Even a tiny bit of water can spoil it.
  • Aluminum, plastic or brass vessels react with the acid in thokku and should be avoided. Use glass / stainless steel / porcelain jars.
  • Salt always has moisture in it. So dry roast it / dry it in sun for a day before using it.
  • Refrigerate thokku to make them last much longer.
  • Have a layer of oil over thokku to seal the surface.
  • Mix in a pinch of preservatives like sodium benzoate / citric acid to make your thokku last longer.

Here is a tasty and refreshing recipe of The Mint leaves Thokku
PUDINA THOKKU PICKLE/ MINT LEAVES THOKKU

Ingredients
Pudina Leaves – 1 bunch
Tamarind Paste – 1 tsp
Gingelly Oil / Any edible vegetable oil -  5 tbsps
Udad dal – 1 tsp
Fenugreek seeds – ¼ tsp
Red Chilly - 4
Asafoetida – ½ tsp
Mustard – 1 tsp
Salt as per taste
Method
Dry roast the Udad, Red chillies, Fenugreek seeds and grind into a fine powder. Keep aside.
Wash the pudinah leaves well and fry in 2 tsps oil till it is reduced, dry and changed its color. Cool and grind it coarse in a mixie.
Heat the remaining oil in a pan, add the mustard seeds and when it begins to crackle, add in the ground powders and fry for half a minute, it shouldn’t become black, then add the tamarind paste and cook for a minute, after this add the coarsely ground mint leaves, and salt as per taste. Mix it all well. Keep stirring continuously till the water evaporates and it becomes one uniform mixture. After a while you will see the oil separates from the mixture and floats on top. This is the indication that it is done. Put off the gas and let it cool and enjoy it as a dip, spread or a pickle.

Monday, July 19, 2010

CHOW CHOW KOOTU (CHAYOTE / BANGALORE KATRIKKAI IN COCONUT GRAVY)

CHOW CHOW KOOTU (CHAYOTE / BANGALORE KATRIKKAI IN COCONUT GRAVY)While growing up in Mumbai I had never ever had this vegetable and when I moved to Singapore I saw an abundance of this vegetable. As usual I asked the Indian Grocery shop person what's this and how it is cooked. Now, most pf the guys who work for the Indian shop are from the villages of India and know a lot about cooking and our South Indian traditional dishes. The guy said, "Just make a kootu with it". So i bought the Chayote thinking to myself hope it turns out well. 
Chayote belongs to the Gourd family along with melons, cucumbers and squash. 
Chayote in India is locally known as Chow Chow (Doesn't that sound like a pet name). It's also known as Bangalore Katrikkai (Eggplants/Aubergines from a place called Bangalore in India).


For those unfamiliar about this vegetable, some info on it
Chayote/Chow Chow/ Bangalore Katrikkai is light green in color, usually pear shaped and sometimes has wrinkles. In Singapore I sometimes see thorn like structures growing at the base of the Chayote. It's a good source of amino acids and vitamin C.
The leaves and fruit have diuretic, cardiovascular and anti-inflammatory properties, and a tea made from the leaves has been used in the treatment of arteriosclerosis and hypertension, and to dissolve kidney stones.
(Some info courtesy :Wikipedia)
With health benefits to add on, I decided to cook it in the below manner. I must say that it turned out yummy and from then on this is on our vegetables shopping list too. Do try and let me know how you like it.


Ingredients
Chow Chow - 1
Yellow split Moong dal – ½ cup
Grated Coconut – 2 tbsp
Red chillies – 2-3 nos.
Curry leaves – 5-6
Udad dal – 1 tbsp
Mustard – 1 tbsp
Cumin seeds – 1 tbsp
Turmeric powder – ½ tsp
Oil – 1 tsp
Salt as per taste

Method
Peel the chow chow and cut into square chunks. Keep aside. Rinse out the moong dal well. In a vessel, mix washed moong dal and little amount of water. Add turmeric powder. Cook it until almost done, add in the chayote, pour ½ cup water and cook until the chayote is soft and the moong dal is totally mashed. Chayote cooks very quickly.  Add salt as per taste at this stage, as sometimes if you add salt to the moong dal it may not cook or take time to cook.
Grind the red chillies(1-2nos), Cumin seeds and coconut to a fine paste in a blender and add to the cooked chayote and dal mixture.
Heat the oil. Add mustard seeds and udad dal and when it crackles add the curry leaves and one red chilly and pour it on the cooked chayote. 
Enjoy this Chow chow kootu with Chappatis or hot rice and pappads.


TIPS
  • Diabetics and Weight watchers, can avoid the coconut.

VARIATIONS
  • You can add Onion and Tomato to this recipe if avoiding coconut, to give it a good flavor. In case adding Onion and tomato, add oil, fry the Onions, one transparent, add the tomatoes and cook until squashy before adding the chayote in the above recipe, This will infuse all the flavors into the chayote while cooking.


Sunday, June 6, 2010

Inspirational Story: Red Rose and the Cactus

Inspirational Story: Red Rose and the Cactus
One beautiful spring day a red rose blossomed in a forest. Many kinds of trees and plants grew there. As the rose looked around, a pine tree nearby said, "What a beautiful flower. I wish I was that lovely." Another tree said, "Dear pine, do not be sad, we can not have everything."

The rose turned its head and remarked, "It seems that I am the most beautiful plant in this forest."

A sunflower raised its yellow head and asked, "Why do you say that? In this forest there are many beautiful plants. You are just one of them." The red rose replied, "I see everyone looking at me and admiring me." Then the rose looked at a cactus and said, "Look at that ugly plant full of thorns!" The pine tree said, "Red rose, what kind of talk is this? Who can say what beauty is? You have thorns too."

The proud red rose looked angrily at the pine and said, "I thought you had good taste! You do not know what beauty is at all. You can not compare my thorns to that of the cactus."

"What a proud flower", thought the trees.
The rose tried to move its roots away from the cactus, but it could not move. As the days passed, the red rose would look at the cactus and say insulting things, like: This plant is useless? How sorry I am to be his neighbor."

The cactus never got upset and he even tried to advise the rose, saying, "God did not create any form of life without a purpose."

Spring passed, and the weather became very warm. Life became difficult in the forest, as the plants and animals needed water and no rain fell. The red rose began to wilt. One day the rose saw sparrows stick their beaks into the cactus and then fly away, refreshed. This was puzzling, and the red rose asked the pine tree what the birds were doing.

The pine tree explained that the birds got water from the cactus. "Does it not hurt when they make holes?" asked the rose.

 "Yes, but the cactus does not like to see any birds suffer," replied the pine. The rose opened its eyes in wonder and said, "The cactus has water?"

"Yes you can also drink from it. The sparrow can bring water to you if you ask the cactus for help."

The red rose felt too ashamed of its past words and behavior to ask for water from the cactus, but then it finally did ask the cactus for help. The cactus kindly agreed and the birds filled their beaks with water and watered the rose's roots.

MORAL: Never judge anyone by their appearance again. God did not create anything without a purpose.

Wednesday, June 2, 2010

AAM PANNA (RAW MANGO DRINK)

AAM PANNA (RAW MANGO DRINK)
I remember drinking Aam Panna in the summers in Mumbai while I was growing up, but that was purchased by my mother from a lady who used to run a small scale industry from home; making syrups, sauces, squashes and jams. I remember drinking it, but not so fondly, so never ever attempted to make it. I used to buy Aam Panna concentrate sold in bottles at Mustafa (Indian super market @ Singapore), but didn’t quite like that too and Yo(my dearest hubby) ended up drinking it.
Last week, when I went to meet my good friend Anu, she was making this drink and I just tasted a spoon of it and I was sold. It was so refreshing, fresh, tangy, sweet, spicy & absolutely tasty, a gamut of flavors exploded in my mouth. I told her that I had never tasted such an awesome Aam panna ever. I realized that the ones I tasted before weren’t so good for me probably because they were not fresh. Fresh Aam Panna tastes awesome.
My friend was also telling me about the intense heat in Delhi and the health benefits of drinking Aam Panna. That’s it I immediately decided to make Aam Panna.
A search on google for health benefits of drinking Aam Panna yielded this;
“Aam Panna is an Indian drink renowned for its heat resistant properties. It is made from green mangoes and it is used as a tasty and healthy beverage to fight against the intense Indian summer heat. Apart from being tasty this drink also looks good due to its refreshing light green colour.
Green Mango is a rich source of pectin, which gradually diminishes after the formation of the stone. Unripe mango is sour in taste because of the presence of oxalic, citric and malic acids.
Aam panna which is prepared using raw mangoes, sugar and an assortment of spices is an effective remedy for heat exhaustion and heat stroke. It also quenches thirst and prevents the excessive loss of sodium chloride and iron during summer due to excessive sweating.
This drink is mainly consumed in the Northern part of the India and is considered beneficial in the treatment of gastro-intestinal disorders. This drink is also a good source of vitamin B1and B2 and contains sufficient quantity of niacin, and since it is prepared from raw mangoes it is an excellent source of vitamin C also. Aam Panna is also considered as a curative for blood disorders because of its high vitamin C content. It increases the elasticity of the blood vessels and helps in the formation of new blood cells. This drink is also considered as a tonic which increases body resistance against tuberculosis, anemia, cholera and dysentery”.
(Info Courtesy on Aam Panna “”:) - Wikipedia

I rest my case………I read this and immediately went in search of raw mangoes. Since it’s the season for mangoes, it isn’t difficult to get them. Anu, told me that I must buy green and firm raw mangoes. Here is how I made Aam Panna at home and let me tell you it was a hit. I didn’t add mint leaves to it, as I liked the flavor of the raw mango so much that I didn’t want to add any other flavor to it. The original recipe has mint leaves, but you can avoid it if you want.
Ingredients
3 medium-sized green mangoes
Sugar – As per taste
Black Salt (Kala Namak) – 1 ½ tbsp
Freshly roasted and ground Cumin seeds - 1  tsp
A pinch red chilli powder/flakes
A handful fresh mint leaves
Method
Peel the mangoes. Cut mangoes into 3 slices each - two from either side of the seed and one with the seed in it. Pressure cook the mangoes in water. Cook until 3-4 whistles. Once done open and allow it to cool. Alternatively you can also cook the raw mangoes in the microwave on high for about 10 minutes (time may vary with each microwave), with adequate water, till softly cooked.
When cool, squeeze the pulp of mangoes, discard the seeds.
Use a hand blender and blend the pulp. Don’t make a complete puree of it. Allow some of the pulp to be there for that natural, fresh pulpy feeling.
Pour into a vessel. Add sugar as per taste, Black salt, Freshly roasted and ground cumin powder. Chilli flakes ( I didn’t add any, as I was afraid my kids may find it spicy).
If you are adding mint leaves you can blend it into the puree. (I haven’t added mint leaves in my Aam Panna).
Once you have mixed the sugar and the spices, taste it if anything is required, add them else you can pour this into clean bottles and store in the refrigerator.
Add 4-5 tbsps in a tall glass, some cold water to top it up. Throw in a few cubes of ice and garnish with mint leaves and Enjoy a cool and refreshing healthy drink.

Since Yo(my dearest husband) not only helped me to buy and carry the raw mangoes from the supermarket to my home, but also helped me to peel and semi- blend the raw mangoes and finally taste it and give his big thumbs-up, I would like to give him some credit and send this to my friend Priti’s His cooking event on her blog Indian Khana

Since Iam using Raw green Mangoes in this recipe I would like to send it to Preeti’s Green Gourmet Event.

Since this is one of the best summer coolers I would like to send this to Divya’s “Show me your Smoothie” Event.

Tuesday, May 25, 2010

MINT PULAV

MINT PULAV
I went for my grocery shopping this weekend and saw a green fresh bundle of mint leaves waiting for me to pick it. I couldn’t resist. It’s scorching hot these days…global warming and all, so I thought I would make something exotic to drink with the Mint, as Mint is cooling and refreshing during summers.....
We come home pretty late sometimes after work and usually frequent this Pure vegetarian Bachelor’s joint @ Serangoon. This joint is open until late and when we reached there at about 10.45pm he told me to try the variety rice for the day, which turned out to be very tasty, when I asked him what rice was that bang came the answer, “Budinaah Rice”(Pudina Rice). Instead of making just Pudina rice I thought why not make Pudina Pulav (Mint Pulav). Since I had the perfectly fresh and beautiful Mint leaves waiting for me in my refrigerator I thought why not let my family taste this wonderful variety rice, so here is my refreshingly inviting Mint rice, sorry didn’t keep any mint leaves for the garnish in the enthusiasm to get that perfect balance in taste.
Ingredients
Mint leaves – 1 bunch
Long grained Basmati Rice – 2 cups
Onions – 2
Green peas – 1 cup
French Beans – 1/2 cup
Carrots – 1/2 cup
Corns – 1/2 cup
Green Chilly paste – 1-2 teaspoons (depending on how spicy the paste is or how much spice you like)
Ginger paste – 2 teaspoons
Bay leaves – 2
Star Anise – 1
Cinnamon sticks – 1
Big Elaichi (Badi Elaichi) – 1
Small Elaichi - 1
Clove – 1
Cumin Seeds – 1 tbsp
Asafetida – a pinch
Garam Masala – 1 tsp
Pulav Masala – 2 tsps
Freshly chopped coriander leaves – 2 tbsps
Oil – 2 tbsps
Salt as per taste
Method
Take the bunch of mint leaves and pluck out only the leaves and if you find the stem attachedto the leaf very tender you can use that also, but if the stems are thick please don’t use. Rinse it well under running water in a colander and keep aside for the water to drain. Meanwhile Rinse out 2 cups of long grained Basmati rice and then soak it for a while in water
Now take the mint leaves, green chilly paste, ginger paste, a pinch of salt and blend to fine consistency in a mixie / blender without adding water.
Now take a wok, put 2 tablespoons of oil, once the oil is heated add in the Bay leaves, Star Anise, Cinnamon stick, Big elaichi, small elaichi, clove and the cumin seeds, once you see the cumin getting fried, add in a pinch of Asafetida(I always like to asafetida in my dishes as it has property to remove gases and in this recipe we have legumes so it is good to add some), the Garam masala, the puav masala and fry for a minute. Now add in the finely chopped onions and sauté until transparent. The onion should look shrunk and well fried. Now, add in the mint-green chilly-ginger paste and sauté well. The color of the paste when fried well becomes slightly light. Ensure that you don’t burn the masala as then the pulav won’t taste so good. Once, the mint masala turns into a lighter color. Add in the vegetables(instead of the fresh vegetables mentioned above you can use 1 ½ cups of frozen mixed vegetables, but I can tell you fresh vegetables taste better thanthe frozen ones) and sauté until the green peas turn into a lighter green, then add in the rinsed and soaked Basmati rice without any water and sauté for 2-3 minutes adding salt as per the taste and mixing everything well. Once this is done you can put this in a rice cooker and add water according to finger level consistency for example when you put your finger in you will know how much rice is there, that much water has to be added or alternatively add water until the rice is completely immersed and there is another cup of water on top. The water level has to be perfect for a perfect pulav, now switch on the rice cooker and keep to cook position. I always use the electric rice cooker for pulav in Singapore but you can make it in a non stick wok by closing the lid and keeping the gas on a low flame. Either way it cooks well. Once the rice cooks, give it a light stir so that everything mixes well without breaking the grains of rice Put the lid back and let it stand for another five minutes. Then turn off the plug.Garnish with coriander / mint leaves.Serve hot. If you want to decorate it some more you can even garnish it with freshly grated paneer.Enjoy the refreshing Mint pulav with any gravy of your choice or just with Papad, pickle and raita, It’s a complete meal.

I would like to send my Mint pulav to
Sara’s Cooking with seeds : Cumin seeds event , since I am using Cumin seeds in this dish

And since it has green peas and beans, I am sending this to Susan’s My legume Love affair 23 Event

And since the main ingredient is Mint (green), this also goes to Preeti’s Green Gourmet Event


LinkWithin

Related Posts with Thumbnails
LinkWithin Related Stories Widget for Blogs
YOUR TEXT HERE